
How to Schedule an Email in Outlook with Pictures
A difficult challenge has always been sending an email at the appropriate moment when the receiver is available. We don’t always want to respond promptly to emails we send. Sometimes, we want to schedule emails when we can’t send them at the desired time or when our recipients are more likely to open them.
Do you want to schedule an email in outlook?
Microsoft outlook has made it possible to schedule an email. Follow the steps below to find out how to schedule an email in outlook.
But, hold on a sec, do you have an Outlook account?
Before we get started with scheduling an email in Outlook, let’s go through how to set up an Outlook account if you don’t already have one.
How to Create an Outlook account
Creating an Outlook account is a smooth process. To create a new account, follow the steps in the order listed.
STEP # 1
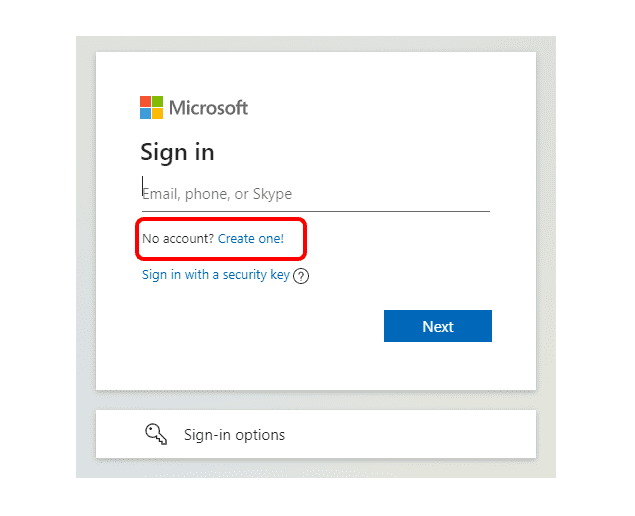
In your browser, type in the following URL: https://outlook.com
Click on CREATE ONE!
STEP # 2
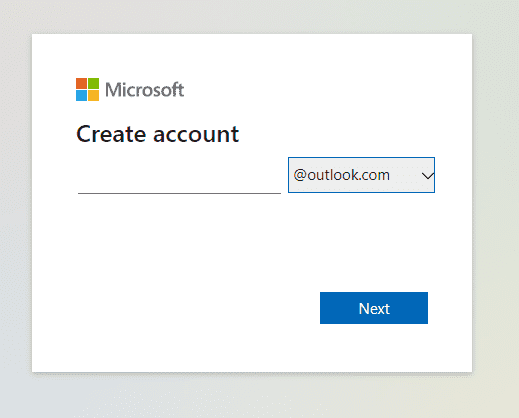
Following that, you’ll be led to another menu where you’ll be asked to enter your EMAIL ADDRESS. A user can create an account using either a “Hotmail” or an “Outlook” email address by selecting one of the options from the drop-down menu next to the EMAIL ADDRESS tab.
NOTE: Hotmail and Outlook are the same services provided by Microsoft in the form of an email client.
STEP # 3
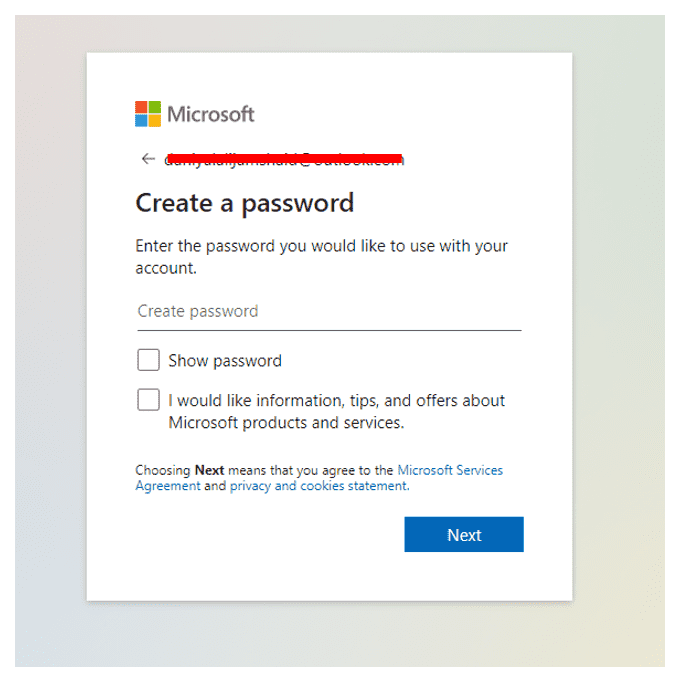
You may use this field to enter the password you want to use. Keep in mind to pick a strong password that incorporates letters, numbers, and symbols in order to prevent your account from being hacked by hackers. (The password must be at least eight characters in length)
Once you have entered your password, click on the SHOW PASSWORD tab to view the password you have typed. Make a note of the password you have entered somewhere safe for future reference.
If you would like to receive information, tips, and offers about their products through email, you can choose to tick the second option.
Before going, make sure you have read the Microsoft Service Agreement as well as the Privacy and Cookies Statement.
When you’re finished, click on the NEXT button.
STEP # 4
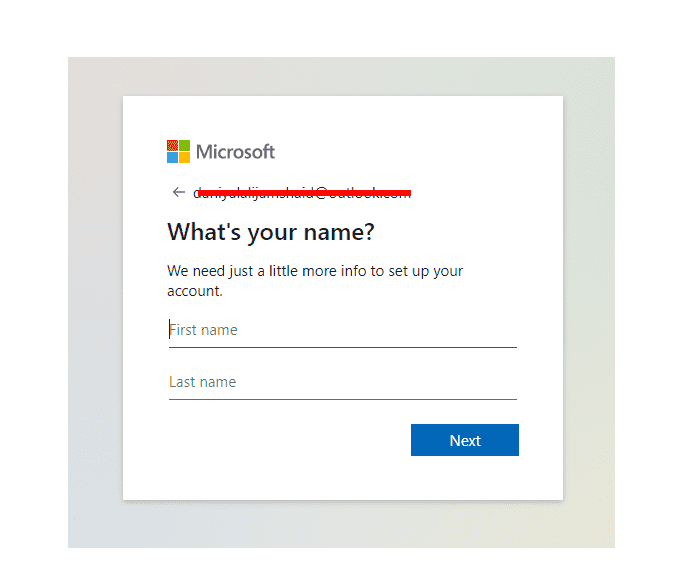
In the following stage, you’ll be asked to provide your ‘FIRST NAME’ and ‘LAST NAME’, respectively. After you’ve entered your information, click on the NEXT button to continue.
STEP # 5
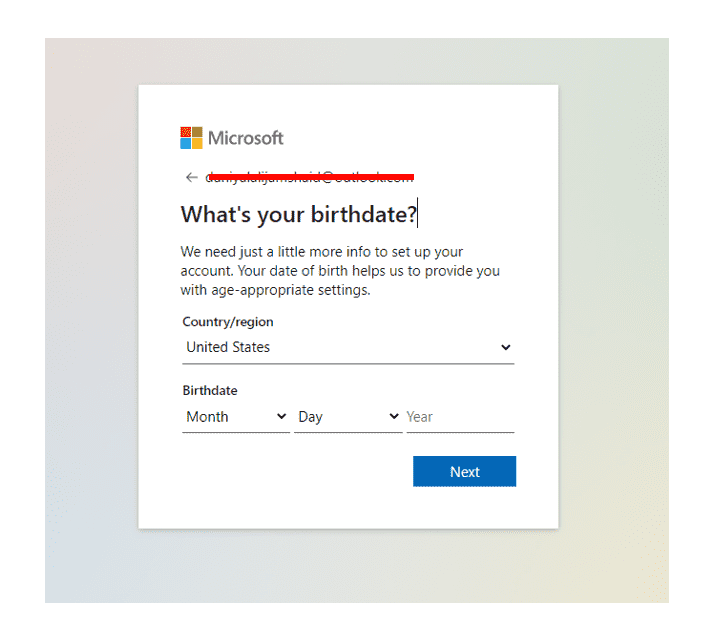
To proceed, pick the region to which you belong and your birthday from the drop-down menu.
STEP # 6
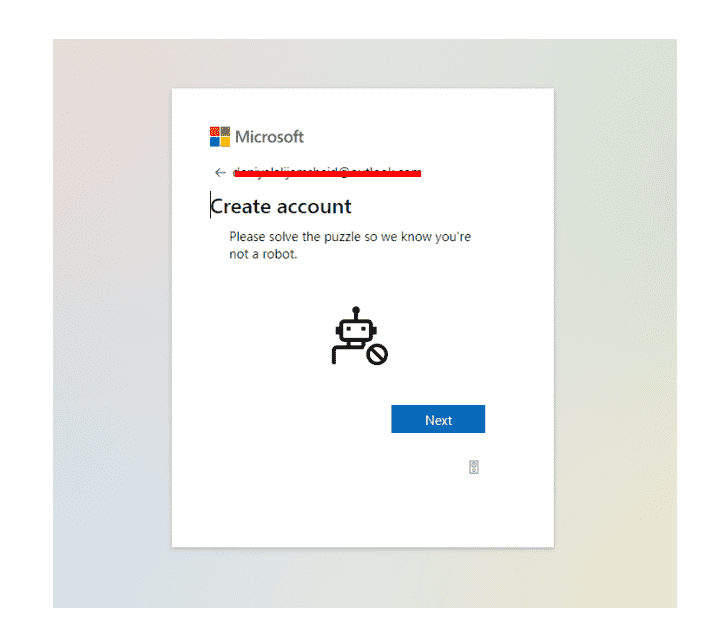
You’ll need to provide proof of your human verification at this point. A basic puzzle will be required in this case in order to verify that you are a human rather than a bot.
Your newly established Outlook account will be accessible from your inbox after the process is complete. With the help of settings, you may further personalize your mailbox to suit your needs.
IT’S DONE!
Now that we’ve set up our Microsoft outlook account, let’s move on to the next step: Scheduling an email in outlook.
HOW TO SCHEDULE AN EMAIL IN OUTLOOK USING DESKTOP VERSION
Outlook, like every other email software, allows you to schedule emails. However, due to the complexity of Outlook’s features, scheduling emails can be a time-consuming task. When users try to plan an email to be sent later in Outlook, they run into problems, according to the users. To overcome, follow the procedures outlined below to schedule an email in Microsoft Outlook:
STEP # 1

Launch the Microsoft Outlook desktop application.
Select the ‘New Email’ tab from the ‘Home’ area of the page.
Step # 2
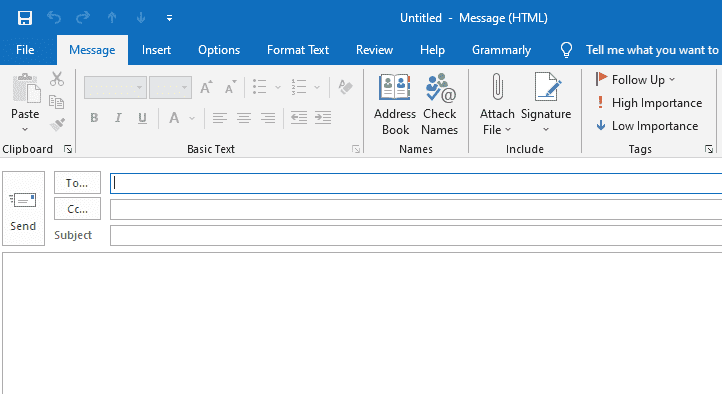
A new window will appear in front of your screen, presenting you with a variety of options for creating a new email message.
The email address of the respondent should be entered in the column adjacent to the tab ‘To…’
If necessary, provide a Cc… field.
Fill in the details with your subject
Last but not least, type in the body of your email.
Make sure not to hit the SEND button until everything is finished since doing so will send your email to the recipient instantly. In this case, we must schedule an email to be sent at a certain time rather than immediately.
Step # 3
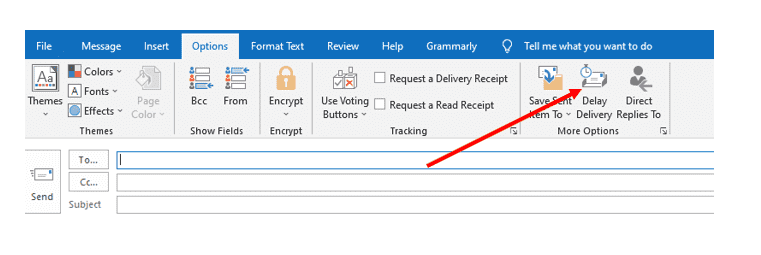
After you have input your information and message, click on the ‘OPTIONS’ tab and select ‘Delay Delivery’.
Step # 4
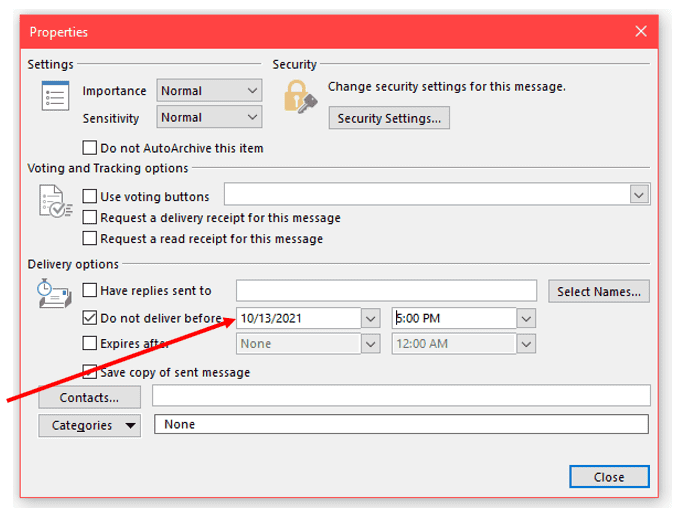
The ‘Delay Delivery’ option allows you to specify the day and time at which you want the recipient to receive the email.
IT’S COMPLETED.
The email will be delivered to the recipient at the time and date you have specified.
How to schedule an email in outlook using the web version
If your device does not already have a desktop version of Microsoft Outlook installed. Through the web version, you may still schedule an email.
It’s the same as what we’ve seen so far.
Visit the following website: https://outlook.com/
To access your inbox, enter your username and password. After that, follow these steps:
Step # 1
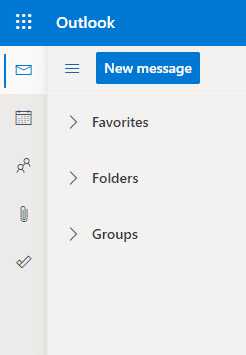
You may see the button ‘NEW MESSAGE’ in the upper right corner of the screen; simply click on it.
STEP # 2
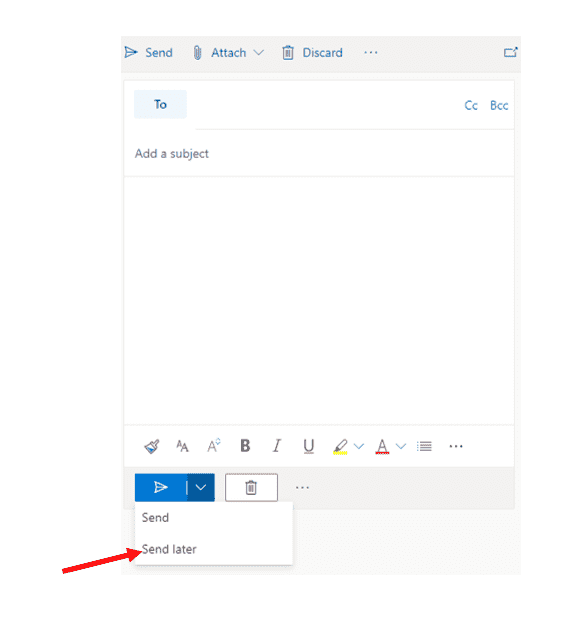
This will open a separate window.
- Fill in the recipient’s email address
- If necessary, provide a Cc: field.
- Create a topic for your email and then fill in the rest of the content
- After that, click on the downward-pointing arrow next to the send symbol.
- Select the option to send later in the next window that appears. Ensure that the date and time you intend for your recipient to receive the email are entered correctly.
And there you have it; your Outlook email has been scheduled for delivery.
You may also like:


